Officer Dan

Social

Find my stuff on social media all over these here interwebs

Get Social with me... Let's hug.

facebook twitter youtube myspace twitter digge

Tuesday, February 18, 2014

How to fishhook a 240sx / Single stage amazingness!


Luigi has been working into the wee hours of the night fabricating in order to get the car painted this past weekend, and it happened. He fabbed a sweet penis looking structure to hold my steering column, also pumped on that. Huge thanks to Luigi's dads shop 'Mario's Engines' for letting us use the hoist and giving us shop time to paint it.

Why am I so pumped on our paint method? Well if any of you are like me, you absolutely despise sanding. This method involved 0 sanding what so ever, and turned out perfect for our application. We used an ebay single stage paint in a dark gray configuration. No reducer needed! We cleaned up the bare metal with thinner and tack cloths and sprayed away.

Keep in mind the car is going to get wrapped, so this is just a nice looking base and interior spray. It was never meant to be show car quality, and was meant to have minimal prep plus be easy to repair.

On top of all of that, Jesse was able to get some amazing shots that have a very vintage / rustic feel to them because of the old school nature of the shop we were in. I love it!

On to the pics!

#dicks

First step was to vacuum most of the dust and sand out. 

Photo by Jesse Wood

Here you can see the ever elusive Kory Slight working the tie down strap with ease. Thanks A-Team!

Trailer life

Once at the shop, we immediately fish hooked the car and stood it up vertically. This served two major purposes (3 if you count looking awesome). First being to paint the bottom of the car, and second to drain the 15lbs of sand from the media blasting. When we tipped the car up it was like an hour glass had been started. Weird and awesome. I have never seen the bottom of a 240sx like this before, and it was pretty cool.

the white underbelly of the beast

top!


The first night we wanted to see how well the cheap paint covered, so we sprayed the underside of the car only. It can out awesome! 

the now gray underbelly of the beast
We let that paint set over night and continued to the top side the next day. We had some issues with the regulator on the gun, so it was spraying at 30psi the whole time. Luigi did a great job dealing with that and had minimal runs.

dat heat!


It turned out nice and shiny, and is a great step towards getting finished! 

On to the rad shots by our very own Jesse Wood!

poser Photo by Jesse Wood

We love teamwork Photo by Jesse Wood

Team Manager Keith strong arming the hoist Photo by Jesse Wood

a tiny amount of cleavage for men is viewable here Photo by Jesse Wood

Texas 240sx Massacre Photo by Jesse Wood

Laying paint Photo by Jesse Wood

Photo by Jesse Wood

Marios Engines Photo by Jesse Wood

Thanks for reading, and stay tuned for next weeks blog roll!


Sunday, February 9, 2014

DIMPLE DIE ALL THE THINGS!!!!


 More progress this week and almost ready for paint. Cage is completely done now, and finishing touches are being added to the front and rear of the car to get the fab work done by weds for paint.  Can't thank Luigi enough for all his help on this. Jesse Wood was on hand as well, filming for our build video as well as shooting some hot snaps of the process. I'll post those up at the bottom.

I don't do much of the fab work, but I like to help when I can. I made all of the plates and dimples for the whip, and they came out pretty damn good if I must say. I want to dimple everything in my life now.

Preview of the machetes I made.

Let's start with the "nascar style" door bars. I love the way these look, and luigi did a great job on them.


We also added the mandatory wheel intrusion bars as well.

He also started on the radiator mounts for the rear of the car, dimples of course included.  :)


Here is the 6 step process to make plate to hold the badassness that is dimple die.

Step 1.

Step 2.

Step 3.

Step 4.

Step 5.
Step 6.
We also did the sections of the car in the front and rear of the car. 


I love the way this looks. More gussets and dimple dies to come for sure. 

Jesse Wood is good, understood? Thanks for the epic shots man. <3

Drill holes yo.


See you all next time!

Tuesday, February 4, 2014

1990 Nissan 240sx s13 Silvia widebody coupe for sale! Rolling shell baller parts SOLD


Ok dudes. Here we go. I have removed parts! The shell is now cheaper. Offer still stands to take all of it now for 7k instead of 8k from before.

Asking 5,000 obo for the shell without the Stance coils and Evo 8 brakes (will have godspeed coils), and 2,300 for the wheels alone.

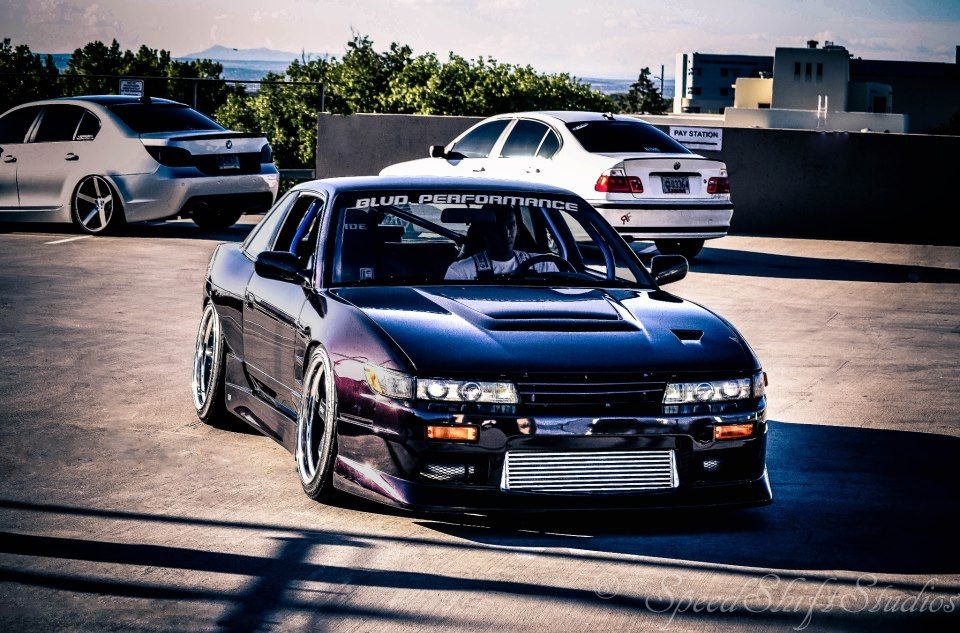
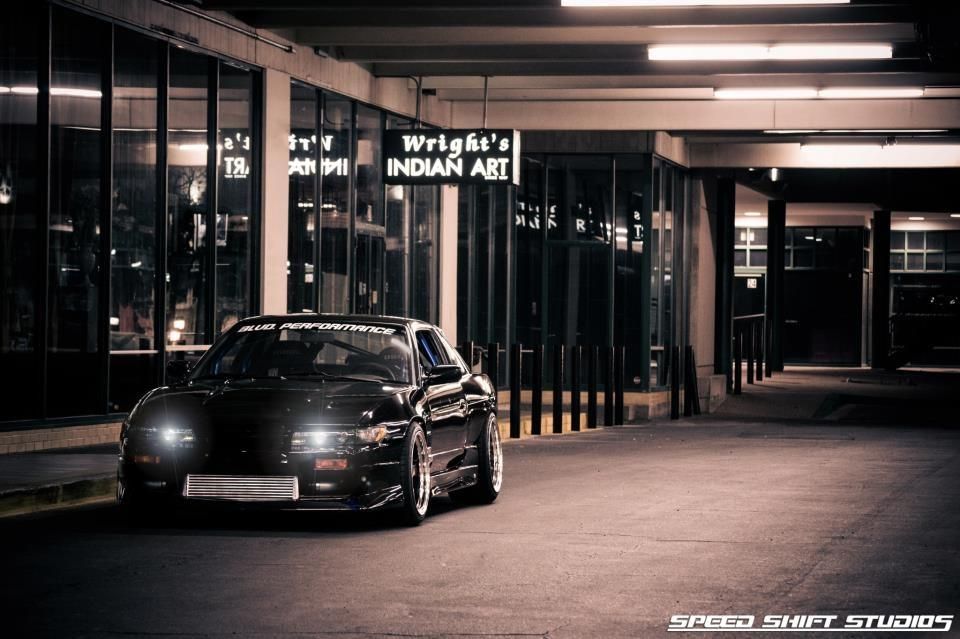
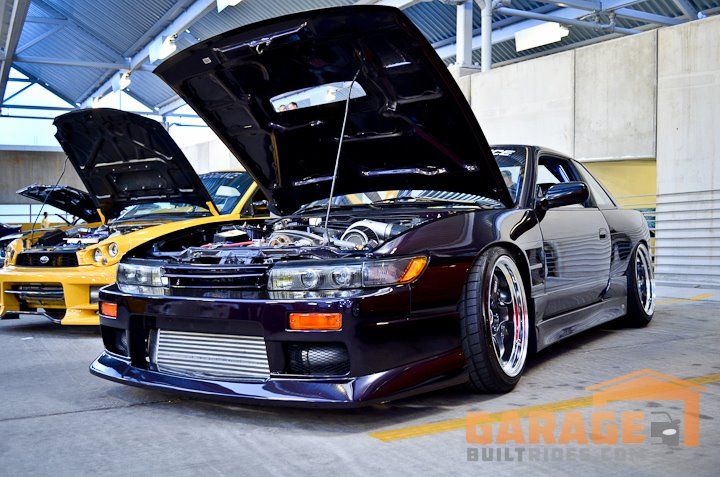
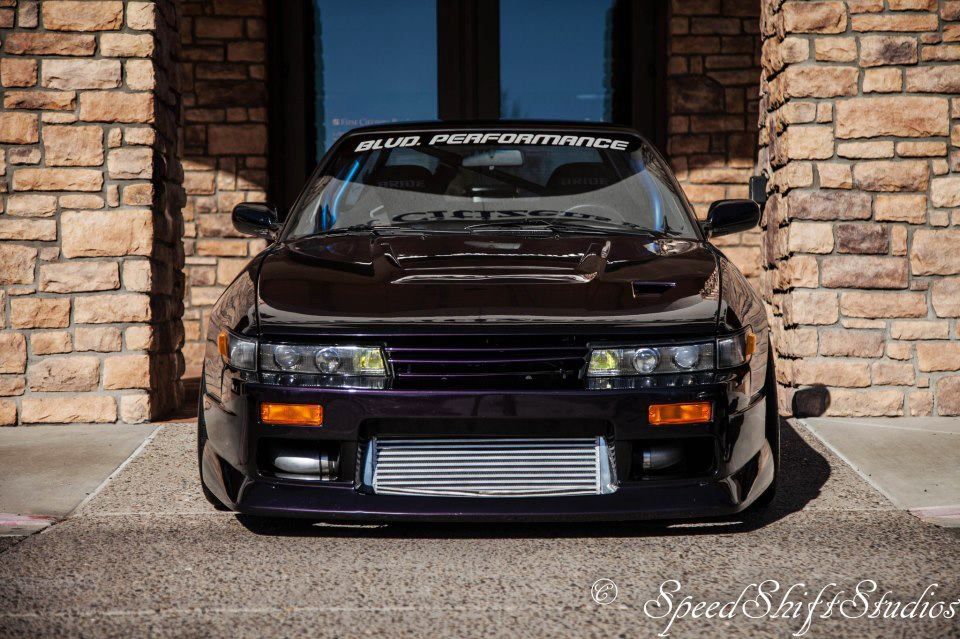
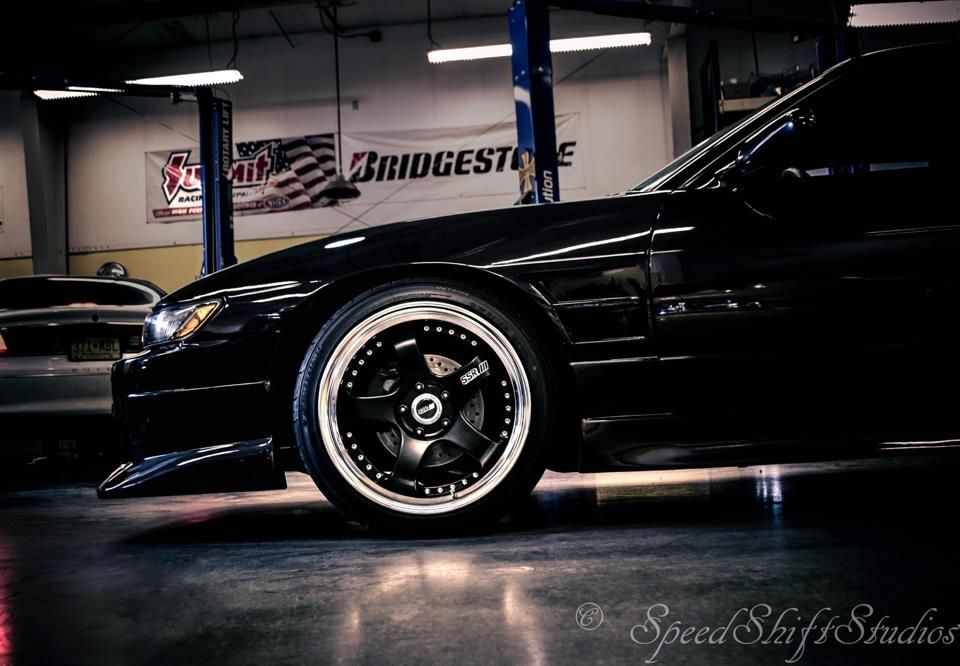
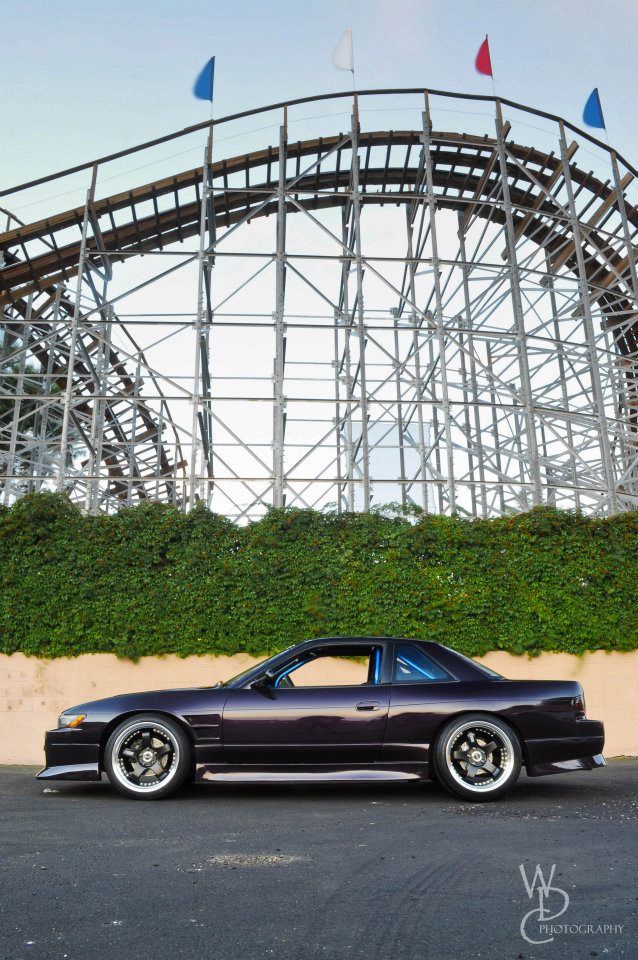
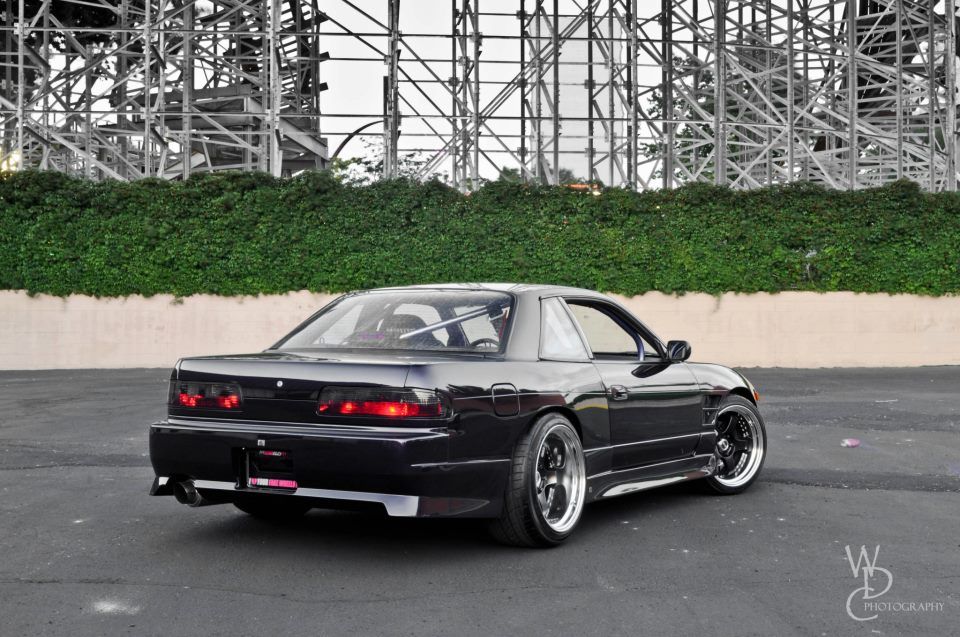
Up for grabs is a 1990 mint purple painted, molded wideboby, full chargespeed aero (including the hood), big braked, baller wheeled coupe rolling shell just begging to have your sr / ka / rb / jz / ls motor put in it. Not going to budge much on the price. If I don't get what I am asking for it, I will be putting a motor in and doubling the price ;) You guys know what all this shit is worth. Don't low ball me. Nothing on it is knock off.

I want to sell it as a whole unit (only thing I'd part out is the wheels), but I may be able take stuff off to make it cheaper. You'll need to message me on that stuff.

Contact me at eyehate@gmail.com for details and pricing. Car is located in New Mexico and will need to be trailered.

7_zpsd4d78d42.jpg
72145_10151459217394342_684533111_n_zps3e5d5248.jpg
Oh ya, power everything, no sunroof.
What it doesn't include:

  • Front seats
  • Motor
  • The bolt in cage in some of the pics
  • Stereo
  • Gauges
  • Exhaust
  • Transmission
  • Headlights
  • Intercooler
  • Piping
  • Corner lights
  • Running lights
  • Grill

Or anything not in the list of included stuff.
What it does include:

  • Stance GR Pro coilovers
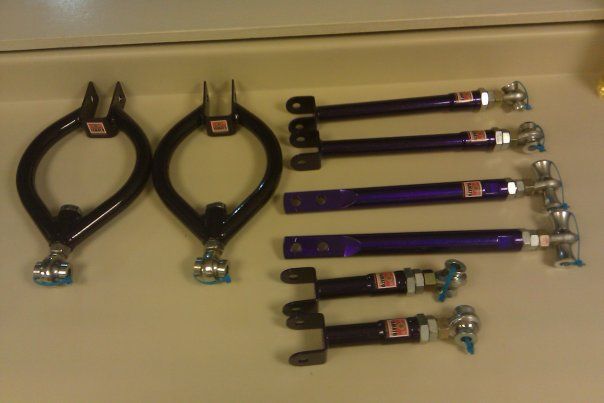
  • Yamato Garage Toe, traction, ruca, tension rods
  • Evo 8 brakes with adapters for the bigger drilled and slotted rotors and calipers
  • Z32 rear brakes with drilled and slotted rotors
  • 5 lug
  • Chargespeed silvia matching numbers body kit (molded rear) with carbon hood (50mm overs front and rear)
  • 2 year old paint job deep purple, including doors, sils, engine bay and trunk.
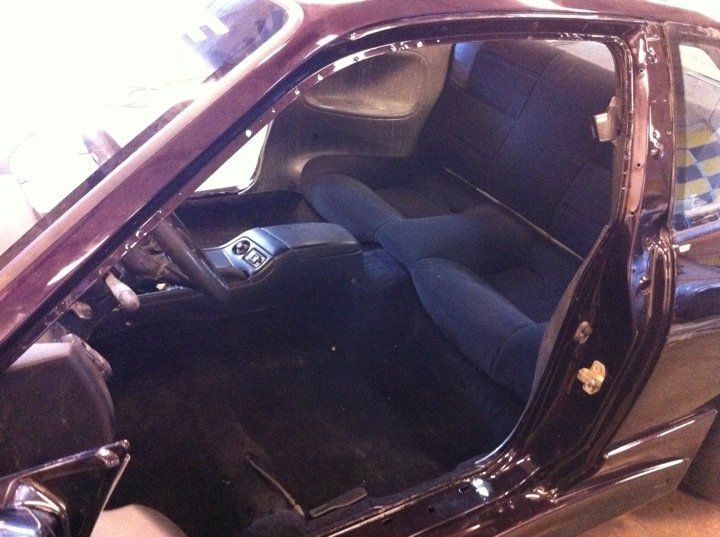
  • Re upholstered rear seats
  • Brand new carpet
  • NRG short hub, quick release v2 and NRG steering wheel
  • D-Max roof wing
  • D-Max smoked taillights
  • Dual in tank walbro set up
  • Tien tie rods and tie rod ends
  • Trunk wired for sub and amp (2 RCA cables and remote lead)
  • Dash cut for stereo in drivers footwell area (so you can run a gauge panel)
  • Kicker ds650.2 component set
  • Kicker ds550 rear speakers
  • Power and ground for amp in back
  • Relocated rear battery (no battery included)
  • Power windows and locks
  • Heads up display works
  • Very sexy dash with one crack in it
  • Open diff

Wheels
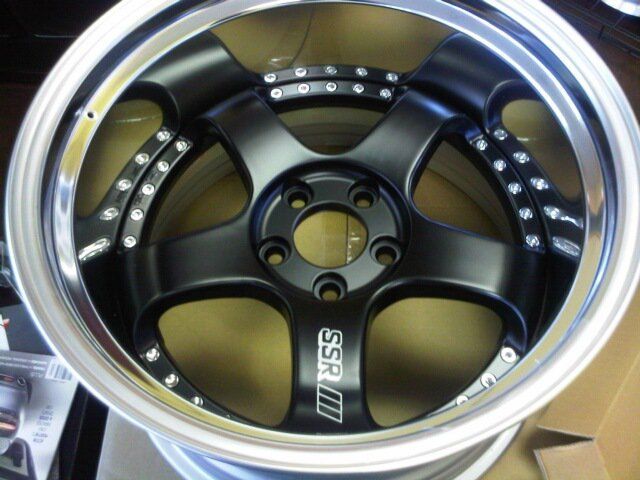
Custom SSR Sp1
Rears: 18x11.5 -8
Fronts: 18x9.5 +5
On to the pics!!!! More pics can be found here: 1990 Widebody Coupe
418223_507652229261728_1601916202_n_zps3f3faf34.jpg
69603_392806594144180_1367401112_n_zpscfdb5263.jpg
270224_10151415004944439_229620369_n_zpsaa05943a.jpg
179145_10150939177779342_1614300812_n_zps3dd78aa8.jpg
205414_10150939178364342_790225679_n_zps4f321ab1.jpg
63867_433774974341_5482317_n_zps2eecc011.jpg
24226_377602344341_5302883_n_zpsb47c7468.jpg
21872_279668949341_4251741_n_zps8575df8a.jpg~original
More pics can be taken if need be, but this shows a damn fine representation of this car. Clean title, ready to be trailered home.